Making Memories: An End-of-Year Digital Scrapbook

- Preview |
- Standards |
- Resources & Preparation |
- Instructional Plan |
- Related Resources |
- Comments
Overview
The goal of this lesson is to strengthen students' writing skills through image and text correlation. Students use their prior knowledge to reflect upon the school year. They create a story of their memories using digital images, clip art, and PowerPoint. Images are placed in sequential order and enhanced using descriptive text captions. After the digital scrapbook is complete, classmates edit one another's work using a checklist. Students present their digital scrapbooks to an audience to reflect on what they have learned and to share their knowledge with the school community.
Featured Resources
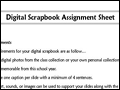
Digital Scrapbook Assignment Sheet: This sheet for students provides the requirements and some reminders about the project.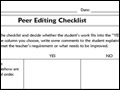
Peer Editing Checklist: Students use this checklist to evaluate another student’s slideshow.

Assessment Rubric: This rubric can be used by the teacher to grade each individual slideshow.
Common Core Standards
This resource has been aligned to the Common Core State Standards for states in which they have been adopted. If a state does not appear in the drop-down, CCSS alignments are forthcoming.
State Standards
This lesson has been aligned to standards in the following states. If a state does not appear in the drop-down, standard alignments are not currently available for that state.
NCTE/IRA National Standards for the English Language Arts
- 4. Students adjust their use of spoken, written, and visual language (e.g., conventions, style, vocabulary) to communicate effectively with a variety of audiences and for different purposes.
- 6. Students apply knowledge of language structure, language conventions (e.g., spelling and punctuation), media techniques, figurative language, and genre to create, critique, and discuss print and nonprint texts.
- 8. Students use a variety of technological and information resources (e.g., libraries, databases, computer networks, video) to gather and synthesize information and to create and communicate knowledge.
- 11. Students participate as knowledgeable, reflective, creative, and critical members of a variety of literacy communities.
- 12. Students use spoken, written, and visual language to accomplish their own purposes (e.g., for learning, enjoyment, persuasion, and the exchange of information).
Materials and Technology
- Classroom or lab computers equipped with Microsoft PowerPoint and Clip Art
- Class collection of digital photos from the school year
- LCD projector and screen
Printouts
Preparation
- For Session 1, bring in five to six of your own personal photos that show a vacation, a particular event, or something else that students can easily sequence in the proper order. Make sure that these photos are also available on your classroom computer.
- Create a PowerPoint presentation of the photos you plan to present in Step 1, placing them in sequential order. Write a descriptive text caption under each photo, using animation to have it appear after the photo displays. This way, students can view only the photo first to discuss possible captions and then read the caption that you provided.
- For Sessions 1 and 2, make sure students have access to the class pictures that were saved throughout the year on either the classroom or lab computers or on a flash drive. Students can also add to the class collection with pictures from their own personal collections.
- Make one copy of the Digital Scrapbook Assignment Sheet and Peer Editing Checklist for each student.
- For Session 5, reserve an LCD projector and either set up your classroom or arrange for another location for presentations of the digital scrapbooks in front of an audience.
Student Objectives
Students will
- Acquire and apply digital literacy skills by creating a PowerPoint scrapbook using digital images, clip art, and text to tell a story
- Recall events from the school year, placing images and text in sequential order
- Critique another student’s scrapbook using a peer editing checklist
- Demonstrate oral presentation skills by presenting their digital scrapbook to classmates and members of the school community
Session 1
- To generate discussion, ask students the meaning of the phrase, “A picture is worth a thousand words.” Have students share their ideas with the class.
- Mix up the five or six photos you selected from a past event or vacation and display them on the board (see Preparation, Step 1). Have students try to arrange them in sequential order.
- Open the PowerPoint presentation you created in advance (see Preparation, Step 2) and present the slides to the class one by one. As you view each photo, ask students to recommend an appropriate caption to go under each one. Display the caption you prepared and discuss how it relates to the students’ ideas. Repeat this process going through all of the slides.
- Explain to students that, during the next session, they will be selecting digital photos or clip art images to tell a story about their school year as an end-of-year wrap-up.
Session 2
- Review the discussion from Session 1, talking about how pictures encourage discussion.
- Hand out the Digital Scrapbook Assignment Sheet. Explain to students that they will use digital images or Clip Art images that represent projects, field trips, and events from their school year. Show them where the class images are saved on the computer or flash drive, and encourage them to add images from their own personal collections during the school year. Have students review the assignment sheet directions and clarify any uncertainties.
- Encourage students to select only those photos that are significant and meaningful to them. Students may choose to center their presentation on one activity or a few activities that they feel were important to them.
- Have students use the classroom or lab computers to begin compiling their digital scrapbooks, placing one significant picture on each PowerPoint slide.
- After students have finished placing one picture on each slide, remind them to save their work. In the next session, they will write captions that match their pictures.
Session 3
- Allow time for students to discuss with the class some of the pictures they chose for their digital scrapbooks. This discussion will help students brainstorm possible captions to include with their pictures.
- Have students retrieve their saved PowerPoint file from the previous session and begin typing captions underneath each picture.
- When students are finished writing their captions, pair each student with another student to peer edit. The Peer Editing Checklist (items 1–4) can be used to critique the work done by each student. After students are critiqued by a peer, they can use the checklist to make the necessary revisions to their own PowerPoint slides.
- Remind students to save their work. In the next session, they will rehearse presenting their digital scrapbook.
- As a closing activity, ask the class to discuss some of the ideas they liked about their peer’s slides.
Session 4
- Tell students that they will be sharing their digital scrapbooks with the class and with other members of the school community. Emphasize the importance of pacing and verbal expression when making their presentation.
- Revisit the slideshow you shared with the class in Session 1. Conduct a 10-minute minilesson modeling appropriate pacing and expression and using hand gestures and pauses. Demonstrate making eye contact with the audience and not reading verbatim from each slide.
- Give students the remainder of the session to rehearse their slides. They may partner up with a classmate and take turns practicing their presentation. Have students answer item 5 on the Peer Editing Checklist, offering their partner feedback on the presentation.
Session 5
- Have students present their digital scrapbooks to the class and school community.
- Invite the audience to comment or make suggestions after all the presentations are finished.
Extensions
- Instead of creating a personal scrapbook, have students create digital scrapbooks about specific careers that interest them. Ask students to interview someone in their community about his or her occupation and create a digital slideshow of images and text that explains different aspects of the job.
- Suggest students complete a similar activity at home with their families, creating a digital scrapbook for a special family event. The activity “Special Memories & Significant Moments: Making an Electronic Scrapbook” could be shared with families as a resource. Even though this activity was originally written for high school students, it can easily be modified for grades 6–8.
- Explore some other websites that can enhance the creation of students’ digital scrapbooks. Note: Use of these sites may require a log-in.
- Voicethread is a website that records your work and allows classmates and others to provide feedback through voice commentary and response.
- Animoto enables you to turn pictures into videos.
- Digital Storyteller allows you to record voice narration through images to create a digital story.
- Voicethread is a website that records your work and allows classmates and others to provide feedback through voice commentary and response.
- The digital scrapbooks can be printed and saved for the incoming class to peruse at the beginning of the next school year. They serve as a nice overview to the upcoming school year.
Student Assessment / Reflections
Assessment involves peer editing and discussion after students’ oral presentations. An Assessment Rubric has been provided to grade each individual slideshow.
- Peer editing is helpful because it builds peer and social relationships within the classroom, and can assist in ascertaining students’ strengths and weaknesses. The Peer Editing Checklist serves as a guide to ensure sequential order of the pictures, text-to-picture relationship in the captions, and a logical flow through each slide to convey a story.
- The oral presentation is a representation of the students’ work and how they convey the message of their work through oral speaking. Discussion will be used afterwards to comment on students’ performance and presentation.
Add new comment